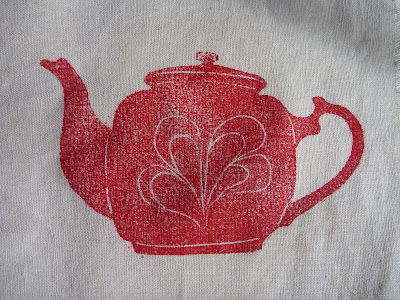
ok, so in part 1 of this production series, we left off at the carving stage... & then i was going to take you through some printing.
so... carving lino is all about cutting away the lino where you don't want it, & leaving it in place where you want to have your print highlighted onto the fabric (or paper, wood etc). i made a little video for you... it shows how i carved the inner detail of the tea pot.
you will notice the line i am carving is very fine... i am using the narrow-est carving tool of my 5 tool set. i use this tool first to carefully go around and cut along the drawn design.
you use various size tools to carve away different levels of detail & surface area. use a bigger tool for quick removal & not so precious areas.

next i glue the my design onto a wood block. mounting onto a block aids the inking & pressing processes of printing.
after the glue dries overnight, its into the shed we go for some printing. i gather my fabrics and sit & ponder for a while about what colours i want to print with...(sometimes this decision is made for me when i have custom orders -- i like custom orders!)

flip it over... press into some fabric & hurrah!! we have a print
next week i will show you all the lovely items i have been making with my new tea pot print.
---
:: for a sneak peak, you could head over to my madeit shop and check out 'this' & let me know what you think?
i also use this large tool to carve all the edges away, so i don't leave too many cut marks visible on the final inked print. (a few is good as it adds to the appeal of a hand-pressed blockprint).
... to also help prevent these marks, i cut (with scissors) the outer edges - leaving about 1cm all around the design

next i glue the my design onto a wood block. mounting onto a block aids the inking & pressing processes of printing.
after the glue dries overnight, its into the shed we go for some printing. i gather my fabrics and sit & ponder for a while about what colours i want to print with...(sometimes this decision is made for me when i have custom orders -- i like custom orders!)
but for today i want some red tea pots! and so i get out my tub of red water-based printing paste, sponge up & ink my block...

flip it over... press into some fabric & hurrah!! we have a print
next week i will show you all the lovely items i have been making with my new tea pot print.
---
:: for a sneak peak, you could head over to my madeit shop and check out 'this' & let me know what you think?


I love your tea pot prints and am soooo glad I chose that for my tea towels. I think I may have to stock up for Christmas pressies and grab some more a bit later in the year too :)
ReplyDeleteTanya xxx
thanks for the rave review tanya:) your tea towel custom order is in tomorrows post, hurray!
ReplyDeletei absolutely love the blue tea pot print you ordered. it looked amazing set against the red lines that are woven in the cotton fabric. almost a bit union-jack style...
i will be expanding on the tea towel front, so i will keep you posted with any newbie's (& / or you will see them posted up over at the BIRCHseed facebook page).
cheers, nikki :)